Well, to say the least, the jewelry party was a success! So successful, in fact, that it took all the life outta me and now I am stuck home with a nasty cold :( But I couldn't let that stop me from posting a few pictures, now could I?
I'll post more pictures as soon as I can take a long enough break from coughing and sneezing! :)
While I would typically blog about strange/beautiful/inspirational/ugly jewelry fashion on Friday, I must admit... I've got nothin' today. This past month and especially week has been non-stop jewelry making, display making, sign making, packaging making, party plannin'... and I couldn't be more excited (despite the 5 hours of sleep I am getting each night!). The jewelry party is tomorrow ... tomorrow! I have most everything ready, thankfully - all that's left is pricing all my items and packing everything up in my car. The Hubs put together two more jewelry displays together for me at the last night (and painted them magenta!), and some more items from Vista Print came in just at the right time. At this point we have about 35+/- people RSVP'ed, which is just what I had hoped :) Cheryl has been making up DOZENS of mini-cupcakes and Marla (the hostess) has a few secret drink recipes up her sleeve! It's going to be a long weekend, but a GREAT one! I can't wait to share pictures with you all come Monday... until then - keep us in your thoughts and prayers! See ya on the other side!
To see other entries I have written about my preparation for the party, click here.
For awhile now I have been saying to my Hubs, "Wouldn't it be great if I could figure a way to create a clothes-pin line kind of effect to hang some of my necklaces on?" We wracked and wracked our brain as to how to exactly do this - do we create some kind of upstanding beam that can hold the two ends of a wire? Do I nail holes in the wall? Do I gut a large frame? Do I hang them from a few table lamps? Hubs and I walked around Lowe's aimlessly a few weekends ago with a pad of paper and my sketching pen at hand - though had no idea how to even begin this crazy project. Finally we left Lowe's disappointed that nothing had sparked our creativity and that we would have to find another way to display the dozens of necklaces I had already mounted on business cards for the party. Next, while walking around Michael's, I found the cutest little clothes pins that would have been perfect for the project. Having already given up on it, we walked through the painting section of the store and had a revelation: use the back of a large canvas! I already had a simple wooden easel that I bought from IKEA years ago at home and that has been aching to be used... so it seemed perfect!
Here's how we created our latest jewelry holding device!...
So we started with my trusty (and inexpensive!) IKEA easel, a 2x2' piece of plywood ($10), and a package of 2 2x3' plain white mounted canvases ($8 at Michael's)... you might recognize the dowels from last week's T-stand project where we put Oriental Trading Company to shame.
We then mounted the canvases against the piece of plywood so they don't fall over (especially once stocked with products!). We nailed it from the back so as to best preserve the canvas itself in case I ever want to paint on it (which, one day, will happen!).
We measured the height of each business card (3") and figured they each needed at least an inch of wiggle room for the mini-clothes pin. I then took some cheap floral wire I've had sitting around for decades and wrapped it around the nails to create my "clothes line."
We must have wrapped the wire around each nail a dozen times or so!
I had been packaging many of my Fall Line and silver dainty necklaces on vertical business cards and included the materials used and price on the back of each card. Then I started adding them to the canvas...
And them added some more!
And before you knew it - we had another jewelry display on our hands!
I am really happy with the result, especially since it cost it less than $20 and can be used again in a different capacity. And best of all, it is light, east to store, and holds 48 necklaces! Whadaya think?
Good Monday, peeps! Let me start by apologizing if my blog posts have been a bit lack luster lately. I am not going to lie, my Etsy sales have been significantly down this month, and by the looks of Etsy's discussion boards, other Etsy sellers are feeling the same pinch. I know that one of the main ways to keep your sales is rolling is to continue to add new products as often as possible (so the search engines show your products, and thus your shop, first). With the jewelry show around the corner (this Saturday!), I have been a bit pre-occupied and distracted by all that it has entailed and have taken it out on my shop :( I have been reluctant to post new items this month because I figure the chances of selling them at my party are higher than selling them on Etsy. Using all my time on the party has also meant that I have neglected my blog a bit, too :( I assure you, by this time next Monday, I will have more pictures and stories than an average post can contain!In addition to making lots more jewelry this weekend (some new creations in addition to renewed ones!), I also worked a bit on my display for the party, including signs! Here are a few things I have come up with:
I have really loved that the online paper printing company, Vista Print, has helped me create my "brand design." Between the business cards, stationary, return address labels, and now this POSTER, I have a congruent and consistent look to all my Bead Up packaging and marketing products. And best of all, Vista Print offers MAD deals (mad as in FREE products - all you pay for is shipping!). In this example, I ordered a "poster" that measures to about 18x32 inches. I didn't think the largest font Vista Print offered was big enough for the Bead Up text, so I bought the poster (well, really I just paid for shipping!) without the text. I used the cardboard box the poster arrived in as a mounting back. I also got out my Cricut and printed up these 3.5" letters on white card stock and glued them on the poster, creating a dimensional and off-the-poster effect that will hopefully serve well at this and other upcoming shows :)
Here's an example of some of the many products that I have made recently but have not posted since I am saving them for the party. I have recently really been into turquoise and deep red combinations, and these Chinese and stone beads just were just asking to be strung together!
I also have been working on a few small framed images to give my jewelry party guests some additional information, including that I take (and love) custom orders! I got the zebra print background from a post on Hostess With the Mostess that offered free printables, and added text on my favorite online photo editing software, Picnic. Then I sent them to Costo.com to be printed at $.14/each and within a few hours I had these :) I made the frame on the left when I was a teenager - I got it on sale at TJMaxx and ripped all the ugly plastic beads that came on it off and replaced it with this asymmetrical look thank to some floral wire and a broken glass beaded bracelet. Finally, the round looking things in the front are a series of napkin rings I made for the party - a great way to get "rid" of remaining beads that aren't abundant enough to make a whole necklace... each one was hand strung and took a good hour a piece to complete!
I used the rest of the cardboard from the poster's packaging to make this little lovely. I mounted some of my favorite lime green paper on a 1x2' piece of upright cardboard, then got back to work on the Cricut to cut out the numbers (with leftover paper from my Jewelry tree project in order to match). The pink letters are from Target's One-Spot, and the Heidi Swapp brown dot stickers we on sale at a Scrapbook convention. In all, the sign cost me about $.25. I plan to have a card table full of $10 items at the party (that way I don't have to label them all!) :)
Here is another framed little ditty I came up with... I plan to "wrap" each order with lime green tissue paper and place them in a white Chinese take out box, topped with a Bead Up sticker and lime green curl ribbon!
And here is a sample of what I hope the display can look like at the party! I of course have many more items and display holders that will span over 4 tables and an easel (more on that on Wednesday!). I wish I could paint all the walls in the house this magenta color - I am in love with it!
It's been a crazy busy week in the Bead Up world. With the jewelry party 8 days away (ak!), I have been spending most of my evenings hunched over the card table in the living room trying to pump out as many creations as possible. I have managed to hit a bit of a dilemma, though, in terms of creating "new" items - is it better to have more items at the party, some of which I am not 100% proud of, or to have fewer items, though all of which I totally love? I am really hoping I can get "rid" of some beads and materials I have accumulated over the past year and still produce items that I really represent me as an artist and that are worth putting a price tag on! Anyway, this weekend the hubs and I are going to work on one more display venue and hopefully I can start to get gift bags, price tags, and packaging ready enough so I don't stress during the week! Here's hoping!That said, I am thus postponing today's Fashionably Friday with an even more interactive post -A GIVEAWAY!I know what you might be thinking: "Christyn, are you going to have any products left after all these giveaways you are sporting?" I just have so many new and renewed items available now that I have been making things in semi-bulk, I can't help but share! So let me introduce you to my sorority sister Lindsay. She lives in South Carolina with her Hubs and almost 1-year old baby boy, Charlie (perhaps one of the most photogenic kids around). She has a lovely blog (you may have noticed that I have had her button on my blog here for awhile) where she features a "Cowboy's Excellenet Adventure" post every Friday, in which she takes a picture of her babe and leave you having to guess where it was taken. For today's entry, she has offered a Bead Up "Faith Ring" necklace for the winner. What a great way to start the weekend!And even better, if you buy something from Bead Up between now and next Friday and mention Lindsay's blog, I will reimburse your shipping! So what are you waiting for? Go to Lindsay's blognow to enter :)
With my first jewelry party less than 2 weeks ago, I have been thinking long and hard as to how to best display and organize my jewelry for the event. A few weeks ago I was browsing through Oriental Trading Company's website and came across this little number:
After factoring in shipping and handling, it would have cost me $25 for these two little guys (that's $12.50 a piece)! Knowing we could do much better, the Hubs and I headed to Home Depot and Lowe's for some dowels and base material. We bought one 1" wide by 3 feet long dowel and another one that was 2" wide, in addition to a husky piece of thick plywood. The Hubs started by measuring the dowels to ensure we get 3 full pieces out of each (with the horizontal top piece totaling to 14").
Next he drilled a hole into each as a way to insert the perpendicular dowel to hold the larger piece horizontally (like our makeshift saw horse?).
With his newlaser saw toy of a thing, he cut the base into 5"x5" pieces.With a little glue and patience, we had ourselves three new jewelry displays! Boo Ya!
Add a little bit of what I have been working on for my Jewelry Party and you have yourself a jewelry display!
And after doing the math, we saved $27.50 (considering that we made 3 that would have cost us $12.50 each from Oriental Trading Company) AND didn't have to wait for them to arrive in the mail! Plus the gratification of knowing you made them yourself is pretty much priceless:)
So, the next big question is whether or not we should paint them? I certainly don't want any paint chipping off on the jewelry, though know a stain or final coat of gloss could take care of that problem. But what color? Or is the natural wood look sufficient? We will at least sand them to ensure no one gets a splinter, but is that enough? What would you do?Also, congrats to Laureen for winning my latest necklace giveaway, and an especially THANKS to Celeste for hosting it! Look out for ANOTHER Bead Up giveaway happening later this week :)
We interrupt this typically jewelry based blog with a special report of Bead Up’s evening at Dancing With The Stars!(So if this doesn’t interest you, come back tomorrow for another DIY entry!).
One of the first things I did when I moved to LA over a year ago was sign up to be on the waiting list for guest passes to some of my favorite shows, namely So You Think You Can Dance and Dancing with the Stars. I got to see SYTYCD in early July, and finally got called to be on the guest list for Dancing With the Stars last week! I went into work last Monday, and after lunch changed in the bathroom into a slick little black cocktail dress and new Bead Up funky chunky necklace and rushed to CBS in West Hollywood with my Hubs to be part of the fun. After waiting in line for 3 hours we were told we were just a few people shy of getting in. Though I should have been bummed, the complimentary VIP seats as consolation weren’t a bad door prize ;) So I took yesterday off of work to make sure we got there in plenty of time this time around, and at 2:30 the Hubs and I arrived (again) at the studio. We got to walk past the long time of people and had seats outside of the studio waiting for us. After sitting in the chilly gray weather for nearly 2 hours, we finally were escorted in at 4:30. When we walked in, one of the gals facilitating people traffic asked if we were a party of 2. The camera-shy Hubs knew what this meant but answered truthfully anyway – next thing we knew we were sitting DIRECTLY BEHIND the judges table! OMG!(all images from abc.com)
(here is an aerial shot of the floor and arrow pointing to the Hubs on the right and me on the left!)
I spent the next half and hour in awe of the studio itself. I have heard that it’s not as big in person as it looks on TV, and though I logically understood that, I was completely amazed with the small size of the studio (this was also the same studio in which they filmed So You Think You Can Dance, which was also small but felt a lot bigger than DWTS). The dance floor itself is about the size of a half-basketball court, and the “large” staircase is no more than an exaggerated flight of stairs. I made sure to see through the wife-angle camera lenses when they walked by me – those things were also catching fish-eye angles! The camera could be literally underneath an object in the air (like a chandelier) yet catch it at the top of its screen (my camera seems so ghetto in comparison). Having been placed directly behind the judges table, I was also amazed with how primitive the thing was. It was merely a series of 2x4’s and dowels painted up, with rickety chairs behind them and little leg room. Each judge got several bottles of water and a can of Red Bull, in addition to their score pallets and personal notebooks.
We of course could not see the dance floor in it’s entirety from where we were seating (we had prime views of the judge’s backs!), so from time to time I stood up to see who was making their appearance on the show. To my amazement, Sharon Osborn was sitting a mere 5 feet away with some of her friends. Next to her sat Latoya and Joe Jackson (dress in all black – still). Across the dance floor sat Iron Chef’s Mark Dacascos’s wife and three kids, next to (and chatting with) Gilles Marini from last season, who also sat next to a gal from the show Brothers and Sisters, in which he is co-staring this season. Down the row sat Marie Osmond and “all of” Donny’s kids and family. And for whatever reason, Joey Lawrence and Jason Biggs sat at the first row of the VIP section at the end of the set. He spent most of his time chewing gum and checking his phone.
In attempt to kill time but keep the audience involved, the emcee asked if any guys were willing to come forward to shake their groove things. One really flamboyant teenager gave us a show that will be hard to forget and left us all laughing. Then the emcee asked for any ladies who wanted to dance – and of course yours truly was the first gal on that dance floor ;) He had me do the Beyonce, and running man, and the Charlie Brown (though I did my best, I had to be careful not to fall out of my dress!). I returned to my seat with the realization that, though I will never be famous, I indeed just got to dance on the Dancing With The Stars floor! Wahoo!
With a few minutes before taping left, the emcee announced the judges. Carrie Anna InabaLen Goodman, who looks in person exactly as he does on camera and acts just as stuffy (in a loveable kind of way!). Then came Bruno – who literally shook his THANG on the stage until the emcee told him to stop and take a seat. He then finally came to his chair and I said “Shake it Bruno!” He turned around and gave me a little “What’s up?” look ;) It was going to be a long night for him with me sitting with a direct view of his tush ;) looks grand with a beautifully long and golden dress that suited her perfectly. She said hi and waved to us as she took her (double cushioned) seat. Next up was Len Goodman, who looks in person exactly as he does on camera and acts just as stuffy (in a loveable kind of way!). Then came Bruno – who literally shook his THANG on the stage until the emcee told him to stop and take a seat. He then finally came to his chair and I said “Shake it Bruno!” He turned around and gave me a little “What’s up?” look ;) It was going to be a long night for him with me sitting with a direct view of his tush ;)
Before we knew it, the lights dimmed and Samantha Harris and Tom Bergeron took the floor. Samantha wore a BEAUTIFUL navy pearl necklace and chandelier looking earrings along with a long blue cheer dress. She glowed as if it was her wedding day (how does she do it?). Tom looks as ordinary as ever, but he had some great one-liners when put on the spot during the evening. The footage of last week’s show began playing on the side screens as the heads of the dancers poked out behind the staircase. The light came back up and we were forced to cheer our lungs out (and thankfully I still have a voice today!). The celebs and their dancing partners strutted down the stairs as the band played loudly. I still could hardly see them with the judges booth in the way, though figured it was worth it. Each dancer took the floor as footage of last week’s individual dancing playing on the side screens. It was especially interesting to see how they prepared for their dances. Some people were totally focused and didn’t interact with anyone (Chuck, for example). Others, like Chelsie Hightower and Louie Vito, watched the footage on the screen and laughed at what they said. Aaron Carter and Karina interacted with the crowd (Aaron LOVED the attention). (to watch the first half of the show, click here).
We could only see the tops of the dancers heads during the performance, which was kind of a bummer but totally worth it (I mean, come on, we get to be on tv!). The gal sitting next to me, who knew nothing of the show and kept asking me who everyone was and what they were famous for, kept complaining that she couldn’t see and wanted to switch seats (are you kidding me? We are going to be on TV!). She therefore took it upon herself to CRAWL to the side of the judges table during each performance in order to see the dances from the floor. If you watch closely, you can also see her standing up during most of the performances, as if she had special access and privileges that none of the rest of us had (another case of LA narcissism). I made a point to try to lean over toward my husband, who had a better view than I did, during the judges’ critiques in order to at least get my necklace on camera. Of course, my husband, who was having a near panic attack when we were first seated in fear of being on TV, was the one who was seen on camera in nearly every shot of the judges. All you can see of yours truly is the side of my hair. LAME! (here are some of the MANY shots of the Hubs on the right).
During one of the commercial breaks, the emcee walked toward us and mentioned how he feels for us since we can’t see. I told him it was OK since we had a prince view of Bruno’s butt ;) As if I hadn’t embarrassed myself enough (who am I kidding? I love this stuff!), he then had me say that into the microphone for everyone in the audience to hear. Bruno turned around and said that they should charge me more for the show, and proceeded to do a little dance of some sort for me. He then blew me a bit of a kiss and said thanks. Later on, during the next dance after Mya performed, Bruno again started moving his butt, which of course induced a shrill on my part. You can barely see it on camera, but Bruno turns around and gave me a little lick of the finger and wink afterward ;) I guess that was my 2 seconds of glory (see it at 32:30 and on the second clip).(Here he is looking back at me... I love Len's confused face!;)
Other noteworthy moments included waving to Sharon Osborne, having model Joanna sit behind the judges booth before her performance and say “hi” to us (that girl is literally the size of a 10-year old around the waist – I can’t image her ever being to bear children with those itty bitty hips!), and watching Marie and Donny Osborne sign dolls of their 80’s selves that someone in the audience brought out of adoration (creepy!). Oh, and during Donny and Kim’s dance, he flipped her around and I was the first to shriek “AH!” You can hear it at the 9:50 mark on the second part of the episode ;)(on the right are the few shots I did manage to find of my face popping out from the side).
Before we knew it (at least me, anyway, I am sure the Hubs was ready to go!), the show was over and the whole cast was standing in front of us again. They had us stick around for a few extra minutes after to get some additional crowd reaction audio footage, during which Melissa Joan Hart stood right in front of us for it's duration (I loved Clarissa Explains It All as a kid!).We were herded out of there (involuntarily for me, I wanted to try to make my way backstage!) and back in the gray and cold LA evening. Our phones (which we had to leave in the car) were loaded with messages asking “Was that your Hubs on DWTS?” We rushed home to see that, indeed, Hubs had a better seat (albeit against his wishes) than I did and made nearly every camera shot of the judges. I guess Bead Up’s TV premiere will have to wait until another day...
If you live in the LA area or are willing to travel out here to see a taping (seriously, there was a lady in the audience who flew in from Pennsylvania just for the show!), you can sign up for tickets here.
So I am not going to claim I know much about "High End Fashion." My knowledge is limited to Project Runway, the magazines at my hair dresser's, and America's Next Top Model (the later being especially laughable!). Living in LA doesn't necessarily give me an edge either unless I succumb to watching runway footage on TV or reading blogs like everyone else in the country. That said, I only know designers such as Oscar de la Renta by name, not by look nor from personal experience. In fact, if you showed me something from his line and something from, oh, let's say, Bloomingdale's, I might not even be able to tell the difference at first, if at all!
Seeing how this could be a dilema, I decided to take a look at the designer's website this week to see what sets him apart from other's, especially in terms of jewelry design. I am actually plesantly surprised by what his line offers, though found that his designs look differently on the models than they do in their standard product shots. Take a look. Example #1:Tulle Ribbon Choker, $450When I first saw the image on the left, I though "Ugh." It looks like an industrial cloudy day. But when I click on the alternative view (the product shot), my grey heart softed up to it! Especially considering the cute ribbon cord and the possibilities of wearing it with a simple black or pink dress! Come to think of it, I have some grey oval beads JUST like those (though I am sure my plastic version doesn't hold a candle to the glass, resin, and metal of this necklace - or COULD it?!).
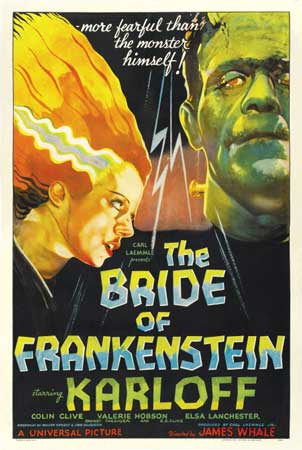
Example #2: Bugle Beaded Necklace, $590Much like #1; love the ribbon of the product shot and could totally see this at a Christmas party with a little red dress, though it looks like a mirror poo-ed all over the remainds of a USB drive on the model (and what's with her Bride of Frankenstien hair?)
Example #3: Silk Corded Necklace, $850It looks like a hot mess on the model. Maybe it's one of those necklaces that shift from either side of your chest thanks to, ya know, girl parts that can seperate long necklaces. According to the product picture, the clasp is in the center, suggesting to me that it's supposed to be worn semestrically. I could also do without the hair-looking braided cord, but other than that I dig it.
There were a few others that didn't even offer a product photo, and I think I can see why:
Gold Loop Earrings, $290
These SERIOUSLY look like something my mom would make out of random pods lying around the back yard and spayed with gold. Don't forget to add Mom's leftover curtains for the finishing touch!Oh, on second thought, it could also be that guy from India's really long, Guiness Book of World Records golden fingernails!Vomit.
And can I also say that, for the record, these prices are RIDICULOUS? No 14K gold, diamonds, or pearls for the price? They seriously use the same material I use in my $35 necklaces!
Speaking of which, look what Mr. Oscar also carries:
Bear any resemblance to the Green With Envy Cluster Bracelet I came out with a few months ago?You be the judge.
Lesson of the day? If you are on a budget like the rest of the world, stear clear of this supposed "High Fashion" and stick with Etsy homemade! ;)
Happy weekend :)(note: I DO have CONFIRMED tickets to this Monday's taping of Dancing With the Stars. I will totally let you know how it goes THIS time around!)
With my jewelry party less than 3 weeks away, I have started to do some serious thinking about how exactly I plan on displaying all my stuff. Granted, I could easily just plop the stuff on a table and focus on the cupcakes and cocktails, but what fun is that? This whole process has proven to me that I am totally my mother, an interior designer's, daughter. And admittedly a bit OCD about it, too ;)
A few weeks ago I stumbled upon an awesome DIYarticle from the ever impressive Hostess with the Mostess on how to make this super chic Pink Tree centerpiece:Of course I went gaga and immediately told the Hubs to invest in the branch material used in the picture, called Manzanita branches (I figured I would let him figure it out since I had no clue where to get it!). Being the thrifty man that he is (to the point of bordering on cheap, gotta love it), he insisted that we didn't need to invest in the branch since the lemon tree in our back yard would work just as well. I was a bit hesitant at first (especially since we are renters!).There were, of course, lots of baby lemons left over. RIP little branch!After chopping down a good hunk of the tree, Hubs trimmed it down a bit and got rid of some of the bark. It was starting to take shape!Having searched high and low at Michael's, Home Depot, and Lowe's, the OCD in me finally found a shade of pink I could live with (i.e. just like the shade in the picture!). And so the spray painting began:We used a whole darn can of spray paint ($6) on this bad boy!Next, we cut some floral foam ($4) to fit into a clear square vase I had sitting around the house. After sticking the (newly dry) branch into the foam, I next had to decide on a color/print for the base (scrapbook paper, of course!). I measured the vase and cut the paper accordingly :) (and of course used Bead Up colors!)
But we can't let the green foam show, now can we? Rather than investing on plastic-y looking fake flowers, I searched around the house for some kind of consistent color and theme for the base. I managed to find 5 different kinds of black flowers I use as hair clips and broaches. Done!Next to hang the jewelry to make sure it works:And Voila! $10 later, we have ourselves a fully functional tree jewelry display!I am sure if I had a baby blue wall like the Hostess with the Mostess example, it would look totally comparable! I kind of like the brown/black "clash" - who says you can't use these two "clashing" colors at the same time? Next week: DIY Jewelry Display - #$*& you, Oriental Trading Company! I can make that myself!
I made my first jewelry sale at the age of 8 when I initiated a fund raiser for a terminally ill classmate outside of the cafeteria during lunch. The product? Old school friendship bracelets! We sold $30 worth on the first day - a large sum in the eyes of a 2nd grader selling constructed string!
My passion continued through my youth as I mastered the art of camp gimp bracelets and teenage hemp necklaces. While shopping in a flea market in Beijing a new medium struck my interest: semi-precious beads! I have since been fascinated with the medium as an element in formal and casual jewelry alike.
Though some of the materials I use in my jewelry are from the local craft store, I purchased a good deal of my materials while bargaining in Chinese on the streets of Shanghai or San Francisco. I thus hope each of my pieces act as a mini-souvenir of places we have each been or hope to go.
I hope you enjoy joining me on my jewelry journey - thanks for reading :)


